

Idea 1 - Video
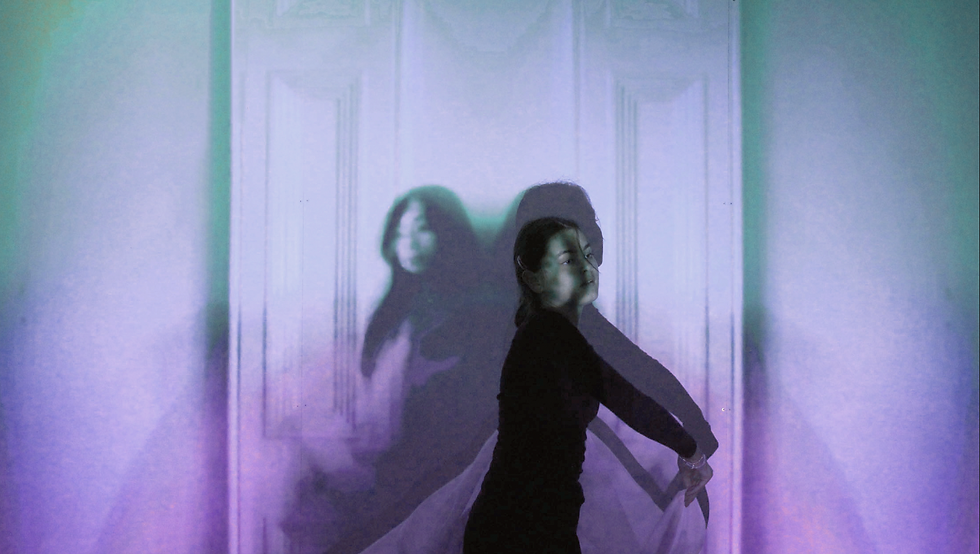
For one of my final pieces I have decided to make a video. Doing a video for my final piece is very suitable as a big concept frequently seen in my work is time. In order to create this final piece, I will be using a projector to project my edits onto a wall. I will also have my model dance holding white fabric and making very 'large' movements. The idea of something being projected is inspired by my third Paolo Roversi shoot. I will take the photos in a dark room and since I am using a projector that will be the 'light' used in my video. One main challenge of this shoot will hold the camera still as that will play a large part in whether my video is successful or not.
FIRST ATTEMPT
This was my first attempt at shooting the video. One successful element was definitely the lighting as the projector was not too bright which was one of my aims when filming the video. One not so successful element was the . If the camera were stable the video would have been a lot better than it was originally. Another reason I decided to retake this video was because of the clothing. For this filming I should have planned ahead, and brought some black clothes so that my model would be more like a dancer and not a school girl in PE kit.
Although I did classify this video as a 'failed attempt' I still decided to edit and tweak it. By just using the camera app on my phone, I selected the video and tapped 'Edit'. I cropped the time in the video down to where it had 'properly' began. I also cropped the video frame so that it would solely focus on the model and fabric, and not anything else that was in the background. I thought that these simple edits really improved the video a lot even though it was quite a simplistic process.


Here are some photographs taken during the filming as I decided that it would be ideal to have some photos taken. I decided to pick some photographs that I believed were very successful and edit them. To edit these I increased contrast, decreased brightness and adjusted the curve. I did this because this enhanced and highlighted all of the fabric's parts. Then, I went to 'Hue/Saturation' to get the 'reddest' red to make the image stand out more to have the main focal point on the fabric and the model. Afterwards, I decided to double expose them as it would add to the surreal atmosphere in the images; I did this by using the 'Rectangle Marquee Tool' and hovered over the entire photo to copy and paste it over itself. Next, I slightly dragged the image to the right and selected the blending option 'Soft Light' to have the image now double exposed. One successful aspect was the colour in the image; the red was not too saturated making the fabric, but also along with model stand out more. One aspect that I thought was not too successful was how some parts were too dark. I could have turned the brightness too down assuming that the curve was going to fix it resulting in some really dark parts of the images. To improve I will make sure to 'Flatten Image' afterwards and turn the brightness down if I do repeat this mistake.
SECOND ATTEMPT
Here are three video from my second attempt at shooting the video. I thought these videos were really successful, but I believe that the video to the left was the most successful out of the three as the model had the best movements with the fabric. One successful aspect was the outfit this time as it felt like it would be the outfit of an actual dancer. One not so successful aspect was the camera stabilisation. I felt like I could have held the camera better so that it was not so shaky; if it was more firm the overall video quality would have been better.
CONTACT SHEET


For this particular shoot, I was not planning on taking it before-hand but when I was taking it my intentions for this shoot was for the fabric's movement to be captured ideally. One successful element was without a doubt the fabric motion as I felt that I had a lot of shots of the fabric mid-air. In addition to this, another unintentional element was the colours captured during the shoot. When taking photos of projected images the camera captures colours that the human eye can not be able to see itself, and the colours and gradients captured by the camera were very flawless and ideal. One unsuccessful element was how some parts of the images were too dark and I therefore could not be able to fix them in Photoshop without the entire image looking too dark ,which I had a similar issue with in my first attempt. If I were to take these images again I would take a lot more as they came out a lot better than expected so that I could possibly edit more developments.
DEVELOPMENTS


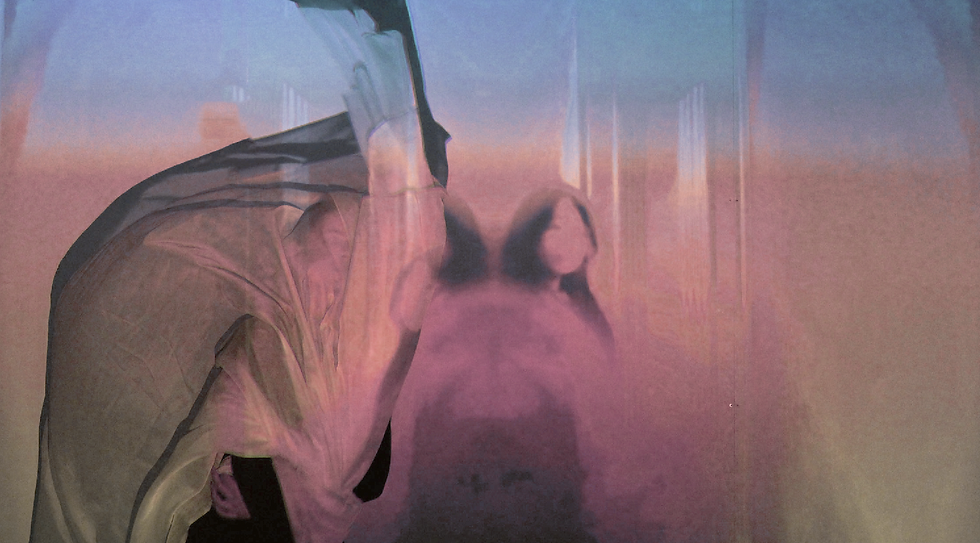
I originally had edited these images very basically: cropped the background out; used the 'Spot Healing Tool Brush' to edit out a socket; adjusted curve; adjusted 'Brightness/Contrast'. However, after this the images were overexposed so I decided to re-edit all of them. To do so, I firstly decreased the hue and changed the saturation of the image to more 'light' colours in 'Hue/Saturation', and I adjusted the curve so that the image was not so dark. Afterwards, I got a pastel colour from Google ,for example millennial pink, and I pasted it over the original image in Photoshop, and I selected the blending option 'soft light'. Then, I went to 'Colour Lookup' and chose the option 'FallsColours.look' as this made the photograph overall more brighter without overexposing the image. One aspect I enjoy is how the colours are more pastel and brighter than before as this makes the entire image stand out more, but the image is now more visible than before. To improve the work, I could have added a second colour lookup layer as this would have made the image more pastel and less dark.
First Edit

Second Edit

FURTHER DEVELOPMENT
When viewing the video I took, I swiped it backwards so I could view it in reverse and I decided that would be a very interesting concept to experiment with my video. To make it in reverse, I firstly went to 'Adobe Premiere Pro' and input the video. Next, I went to the 'Colour' section and right-clicked on the clip and selected 'Speed/Duration'. I selected the option 'Reverse Speed' and time interpolation 'Frame Sampling'. As a result this reversed the video. I believe that this was even better than the original video as it displayed time even better than before, which was one successful element. To improve for next time, I could learn how to have the colours of the video change similar to the shoot I took during this filming.