ELENA OGANESYAN
ARTIST RESEARCH :


Elena Oganesyan is from Moscow, Russia. Elena Oganesyan graduated from Moscow State University of Printing Arts. She was a Russian based photographer which with long exposure to create these simplistic but meaningful photographs. Elena was self-taught and she was fond go photography and found it spontaneous. This made it a big part of her life. Throughout her photography she connects with her own hidden fears and desires. Elena not only expresses her individual hidden apprehensions, but she also advocates for many others who retain their worries and desires disguised within themselves. She quotes : "People tend to hide their innermost feelings. We don't like to discuss them or express them in daily life". Most of her works she shoots in long exposure. It permits her to articulate herself via movements rather than storytelling. This technique encourages energy to infiltrate the process of every instant of the journey. From looking at her images for the first time, I can see that she was very simplistic, however it is filled with emotions. This is seen and felt with the body language, the distorted images and the variety colours used. When taking these snapshots she preferred to use a digital camera and also preferred to shoot in natural daylight. Oganesyan mostly shot with the body and shot doing portraiture. All her images included blurred and distorted versions of the body. To generate these eye-catching long exposure photos she would adjust the shutter speed to have more time to move and express her emotions more vividly. The images had a grainy image to it which made it look like it was taken on a film camera. The grainer the image means she shot with high sensitivity. She liked to shoot in natural daylight which means she preferred more high-key lighting. However, some images a shot with a low-key background. Oganesyan shot with both high key and low key lighting to give off multitude of perspectives but also to interlink with the emotions given by the person in the photos. The hues and the temperature of the images also interlink with the emotions and the body language seen in the imagery. The colours can be cold and warm depending on the hidden feelings or on how the images turned out to be.


Furthermore, Elena Oganesyan preferably shooting in daylight, accentuates the features of the face and made the miniature details in the portraiture make a statement. The long exposure not only makes the photographs look fascinating but it generates something that is never existed and reveals surprising and mysterious fragments of life. All her photos are in one big nameless series but each individual photograph has a unique narrative. Oganesyan uses many editing techniques such as double exposure and inverting. By using these techniques it generates the snapshots to be more compelling for the audience.
From looking at her work I am able to see how she related surrealism and abstract photography. In her work you can mainly see monochromatic colours. Manipulating with the model, she does utilise toned down hues to contrast with the poses and the figurative lines shown by the models. In addition, her work can be considered as self- portraiture, as she generates her photography by using her hidden fears. Not only does she speak for herself but she also speaks for everyone. When viewers look at her work they can create many scenarios in the head just by using their own feelings that they are hiding in themselves.
After looking into Elena Oganesyan's work I was intrigued by her work that incorporated long exposure and distorted figures and portraiture. Portraiture is something I really enjoy doing because I have the opportunity to express my feelings in different ways. In addition, there is a lot to capture because you are focusing o the face which can have a variety of narrative and menages behind it. I love the simplicity of the series and the use of hues for every picture and how it is developed by just adjusting the saturation. What makes the artist work so amazing is her attention to small details. For example, being able to let the emotions show. You can tell this if you look closely at her composition and lighting in each photographs but also the background being used aswell.
PHOTOSHOOT PLAN :

INSPIRED PHOTOSHOOT :


These contact sheets are a preview of my first photoshoot in the style of Elena Oganesyan. I used a dark room to take the photos. They were taken in a dark room because long exposure is in need for the dark. Not only that, but using a dark room and be seen as low-key lighting. However, I did let some natural daylight to shine through when shooting. This was to create the light images and also the dark
images. In addition, usage low-key lighting enabled my moving figure to be seen by the naked eye. My figure should seen as I am shooting the style of Elena Oganesyan but also because she uses portraiture and the body. By moving I wanted to create different emotions but I wanted to do slight movements so the images don't turn out to be very blurry. Generating many facial expressions made the snapshots more interesting. The facial expressions can also give a multitude of atmospheres, such as happy. sad and angry. I capture these images using a long exposure app. To take some of the images I also employed small camera movements and I had stayed still when that was occurring. Furthermore, varying the shutter speed allowed me to have time and generate many emotions in one image. This made the process and the photographs more interesting. The photographs I have circled are successful images such as good compositions, visible etc. However, the images that are not circled are examples of bad compositions, blurry or too bright. Furthermore, there are some snapshots that did turn out to be successful but they are not circled. This can lead to utilising them in the editing process. In my third and last contact sheet, you can see how the last five pictures have turned out. These are successful because of the emotions I have portrayed. The screaming face beside the face with no emotion can give and generate a narrative. Overall, using the successful raw images I want to transform them into my own unique style but also make them turn out like Elena Oganesyan.
DEVELOPMENTS :


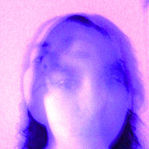
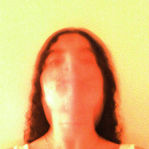
I have created this gallery to show me editing in the style of Elena Oganesyan. I have edited twenty five images in total. I have chosen these specific images because they caught my eye when capturing them and they turned out to be successful. The editing process was interesting as I have learned new techniques using photoshop to develop my photographs.
These are showing the process of the editing of the images. I first opened the image in photoshop. I then used the button colour lookup. This button gave me many filters such as colours - blue, grey, red, purple, orange etc. These filters allowed me to choose the right colours to fit the image and the emotion being expressed in the snapshot. To enhance the pictures and make my figure more known in the snapshot I utilized and adjusted the brightness and the curve. This allowed the second face in the image more clear and visible to the naked eye. While using these exact steps, they turned all my images into success.
Developing these in the style of Elena Oganesyan aided me to discover a new skill in developing my photos and making them more striking. After looking at my images closely when editing, I was able to pick out the technical aspects of the image and improve them from the raw images I took. I used photoshop to develop my images mainly focusing on the hues and the colour filters she uses in her work. Adding the hues to my own work that I have seen in Oganesyan's work changed the whole image completely and added somewhat of narrative. With some images I toned down or accentuated the saturation of my photographs. I adjusted the saturation of the colours and the filters I put over my images because it would have taken away from my figure. Not only that, using the different colours linked with my profound project hidden identity. This means trying to express my emotions but in different ways such as interlinking or juxtaposing with the colours. I think I could improve my work by not making the atmosphere or the studio to dark ash want the figure to be perceivable to the audience. Ina addition, I would like to focus on the composition and make it neater and appealing outcome. This is leading to adjusting the shutter speed so I have enough time to make my second emotion appear. However, these developments did turn out to be successful and I was able to produce many snapshots with my skills and have it in the style of Elena Oganesyan. Whilst compelling this photoshoot and developing these twenty five images, it has taught me on how to create a concept with emotions and express them and make it clear to the audience. Thus, it can make my illustrations clear and prominent.
FURTHER DEVELOPMENTS :
DOUBLE EXPOSURE


This is a gallery showcasing my further developments of double exposure. Doing this set of further developments improved my skills and changed my photographs to a whole new image.
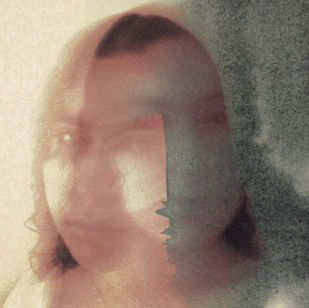
These are showcasing the process of double exposing my images. To double expose my photos I took photos of ink on paper. Taking snapshots of the ink allowed me to improve my photographs as a whole. To create these further developments, I opened my edited images in photoshop. I then pressed ctrl c on one of the ink images and then pressed ctrl v to paste it on my edited image. To layer both images together, I used the filters given to me by photoshop. Filters for example, linear dodge , screen etc. To finish the process and make both images naturally overlay each other I decreased the opacity so it does not take away from the distorted figure and the whole snapshot overall. Through use of double exposure in the composition of these portraits offered them a new dimension. I was able to determine key components of my modified photographs and strengthen them after looking at them extensively. To move the ink image and place it in the right area and have the composition interlink, I pressed ctrl t to do so. Not only that but, it also looks similar to the style of Elena Oganesyan. In addition with the hues of the photographs and the emotions merging with the abstract patterns of the ink , I was able to conflict an eerie and dark atmosphere.
Overall, these set of developments reached my expectations and turned out to be successful. Just by enhancing the brightness or the opacity, it was possible to manufacture a series of eye-catching photos. The process of making this gallery improved my skills and thus made my snapshots more prominent.
FURTHER DEVELOPEMNTS :
EXPLORING WITH COOL COLOURS

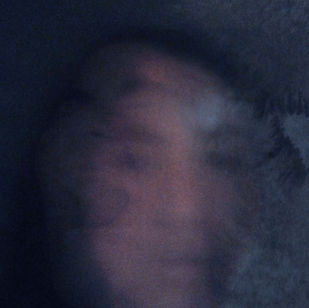
In this specific gallery I experimented with cool colours. These images are the further developments of double exposure. Even though the previous have already been edited and have the filters added onto them, I wanted to begin and further develop the snapshots even more. I wanted to leave a striking effect towards my pictures. To do this, I utilized colour lookup to add the filters. However, I only used filters that correspond with the cool atmosphere I am trying to illustrate through this gallery. The filters I used are called futuristic bleak and crisp winter. These filters left an effect of a gohstly atmosphere. These are also illustrated through my body language and how I express my emotions. Expressions that are mostly used in my images are just a straight face with no emotion. To reinforce this specific emotion, I created many different emotions and faces. For example, screaming , regretful, sad etc. these helped create an eerie and abnormal mood. I wanted to used these cool colours to interlink with my body language. To enhance these pictures, I adjusted the brightness and decreased it to make certain areas in the photograph darker to add more of an mysterious and odd feel. Whilst compelling this photoshoot I was able to produce many snapshots with my skills and with just one step. That one step made my work very impactful and developed my photographs into new art. One image that caught my eye, is my second last development because everything is visible, such as my figure, the ink and the cool filter. Overall, these set of developments reached my expectations and turned out to be successful, distinctive and unique.
FURTHER DEVELOPMENTS :
EXPLORING WITH COMPOSITION
I explored with composition in this collection. I erected arrangements combining photographs from the second further advancements. This was accomplished by increasing the canvas size of the very first image I opened in Photoshop. The second image was then copied and pasted onto the enlarged surface. Afterwards, I proceeded and repeated the process, however this moment with a different image. Subsequently, I obtained multiple images beside one another. I iterated this method multiple times and resulted with three pieces, including one with a different ideology. This is exemplified via the employment of graphics in a certain order. Constructing a scenario with only three shots and positioning them in strategic locations does indeed have a major influence upon that viewer. Observing at the composition can inspire the viewers to contend with their very own thoughts or develop something captivating in their imagination based solely on what they see. I did arrange portraits of the very same tone together with these specific snapshots. This underlines my sentiments and body movements. Consequently, it integrates the candid shots and merges them together. Through my configurations, I have fulfilled every one of my objectives and managed to produce several storylines. I was able to shoot in the style of Elena Oganesyan but put my own unique style on it. To improve my work, I would like to use more of my body and not focus too much on portraiture. However, I do not want to get rid of the portraiture completely.
2nd PHOTOSHOOT INSPIRATION :


This second photoshoot is going to be more focused on the body. For example, using my arms and my hands. Using these parts of my body I am able to create a narrative or make my images become idiosyncratic. This will be considered a second series as I am experimenting with my whole body instead of just portraiture.


These contact sheets are a preview of my second photoshoot in the style of Elena Oganesyan. With these specific photos, I mainly focused on using my body. For example, my arms , my hands and my torso upwards. I took these photos in a dark room with a medium tone grey backdrop. I did not want to use a black background because I did not want to take away from the main focal point - my body. However,
using a dark room provided me with low-key lighting. To incorporate her tricks in my work, I let some natural light shine through when shooting. This was to create the dark and light images while shooting. In addition, using low-key lighting enabled my figure to be seen by the naked eye because I am shooting using long exposure. My figure should be seen in all the images as I am shooting in the style of Elena Oganesyan and because she also shoots with the body and portraiture. By moving my arms and putting them in different positions around my body enabled me to create a multitude of compositions that turned out to be successful. I also generated some facial expressions such as screaming or with no emotion. I wanted to carry out a theme of 'no emotion' throughout my portfolio. When capturing these images , I made miniature movements or I employed small camera movements when the camera was still. Furthermore, varying the shutter speed allowed me to have time to make more emotions in one, for example. The photographs I have circled are successful images such as good composition, unique, right brightness etc. However, the images that are not circled are examples of bad compositions , too blurry , too bright etc. There are some snapshots that are not circled which can be used in the editing process. Overall, the pictures stood out, specifically the ones with the deformation of my arms and the composition with the flowers. Thus, using the successful raw images I want to transform them into my own unique style but also make them turn out like Elena Oganesyan.
DEVELOPMENTS :

This gallery is a showcase of my second developments from my second photoshoot. In this specific photoshoot the main focus was using the body. I used my arms , hands and made compositions with my body. For example, wrapping my arms around my figure and placing them in interesting placements. However, I created emotions with my face to generate more striking images.
These are showcasing my process of how I develop my images. I first opened the image in photoshop. I then used colour lookup to add a filter on top of image so it is similar to Elena Oganesyan but also to give it an eerie atmosphere. I used the filter named DropBlues. This filter created a cool atmosphere that is seen in Oganesyan's work. To not over edit the snapshots I adjusted the brightness and contrast. This made the image more striking because everything interlinks and it does not look messy. I wanted to include my hands in the images or a body part. In order to that, i took pictures of me holding flowers or placing my hands in different
compositions. To double expose that photograph on my edited photos I pressed ctrl-c to copy and then I went ahead and pressed ctrl-v to paste. Furthermore, I used the filters given to me by photoshop such as, linear dodge, screen, overlay etc - to double expose. To enhance the photographs I decreased the opacity on the second layer when I double exposed. This is done to not take away form the distorted figure shown in the image. While using these exact steps, they all made my images successful. In addition, some images have been edited only with brightness and contrast. This is because some raw images already look edited. To develop them I also adjusted the saturation instead of adding the colour filters to give a different aura. However, these developments did turn out to be successful and I was able to produce many snapshots with my skills and have it in the style of Elena Oganesyan. Whilst compelling this photoshoot and developing these twenty five images, it has taught me on how to create a concept with emotions and express them and make it clear to the audience. Thus, it can make my illustrations clear and prominent.
FURTHER DEVELOPEMNTS :
EXPERIMENTING WITH BLACK & WHITE

This gallery is showcasing my experimentation in black and white. These images are further developments of my first edited versions of my raw photographs. By adding the black and white, I wanted to leave an intriguing and eerie atmosphere to my photographs. To further develop my snapshots I just opened the edited pictures in photoshop and pressed the black and white icon. This automatically changed the photos into this filter. To enhance the images I adjusted with colours of the image. This lead to making the images not look over edited but look professionally edited. Not only that, but adjusting the colours - for example decreasing and increasing them - left a big impact. This is accentuated by the face not being to bright and also the background. The black and white filter left a ghostly feature to all 9 images. These also illustrated thorough my body language and how I express the dark emotions. For example, placing my arms in specific positions around my body and showing fear through my face. In addition, the flowers in the images you see also gives an effect of death or reincarnation. Holding the flowers can represent life. This gives the images a sense of narrative. Overall, all of the ideas I mentioned into making these photos as a whole helped create an abnormal mood. I also increased the brightness and decreased the contrast to make the focal point dark. The created a juxtaposition but also ensures the low-key lighting is shown. Whilst compelling this photoshoot I was able to produce many snapshots with my skills and with just one step. That one step made my work very impactful and developed my photographs into new art. One snapshot that caught my eye and see as successful is of me looking back at the camera. This is because you can clearly see my face and the story I'm trying to send. Overall, theses set of developments reached my expectations and turned out to be successful, captivating and appealing.
FURTHER DEVELOPMENTS :
EXPLORING WITH COMPOSITION


I explored with composition in this collection. I erected arrangements by combing photographs from my first developments from my second photoshoot. This was accomplished by increasing the canvas from the very first image that is opened in photoshop. The second image was then copied and pasted onto the enlarged surface. Afterwards, I proceeded and repeated the process, however this moment with a different image. Subsequently, I obtained multiple images beside one another. I iterated this method multiple times and resulted with three pieces, including one with a different ideology. This is exemplified via the employment of graphics in a certain order. Constructing a scenario with only three shots and positioning them in strategic locations does indeed have a major influence upon that viewer. Observing at the composition can inspire the viewers to contend with their very own thoughts or develop something captivating in their imagination based solely on what they see. The first composition you can see how I put images that have the same flower double exposed on it. This makes them connected and this can be turned into a storyline. In the second composition I placed together images that have my arms deformed around my body. Finally, in the last composition, I added three images that include a hand in it. Consequently, it integrates the candid shots and merges them together. Through my configurations, I have fulfilled every one of my objectives and managed to produce several storylines. I was able to shoot in the style of Elena Oganesyan but put my own unique style on it. Overall, I believe all three compositions are successful and distinctive.
HIGHLIGHTING SUCCESS :

These two developments were definitely the most successful two edits out of all the edits I created from my first and second photoshoot.
The photograph on the right is successful because of a the composition. For example, me looking back with just a simple emotion, however this is contrasted with double exposed image of the flower. The use of the flower creates a story line. The photograph on the left however is successful because of the composition, filters and the ink. Double exposing the ink on the snapshot and accentuating it with the filter, creates a striking meaning.
Using these steps on both images transformed them into eye-catching photographs. Not only that, but I both added cool filters during the edited photos to create a more eerie atmosphere.
.jpg)


