

Final Piece
My final piece is based on my metamorphosis page, it will link back to my artist/videographer, due to the fact that my best development outcome in my metamorphosis page is what I am using to explore into further composition for my final piece, it will also be relatable to the videographer due to me doing GIFs of the developments I get in my first photoshoot of the final piece page. My aim for my final piece is to take photoshoot of my brother, with a black background, and then double expose trees, with cuts running down through them, onto my brother, giving that ripping of skin with the inside being raw flesh. After that I aim to do 9 GIF developments coming from the 12 outcomes, once doing that I will upload the GIFs onto a projector and with the cut opening and closing from the GIFS, I will take also involve a see through curtain and shake it about giving the strange effect to the work, all whilst keeping the work theme related to identity and metamorphosis. Once done, I will pick out three of the best edits and print them out and frame them on a 30 x 40 size, finishing of my identity unit 2.

contact sheet


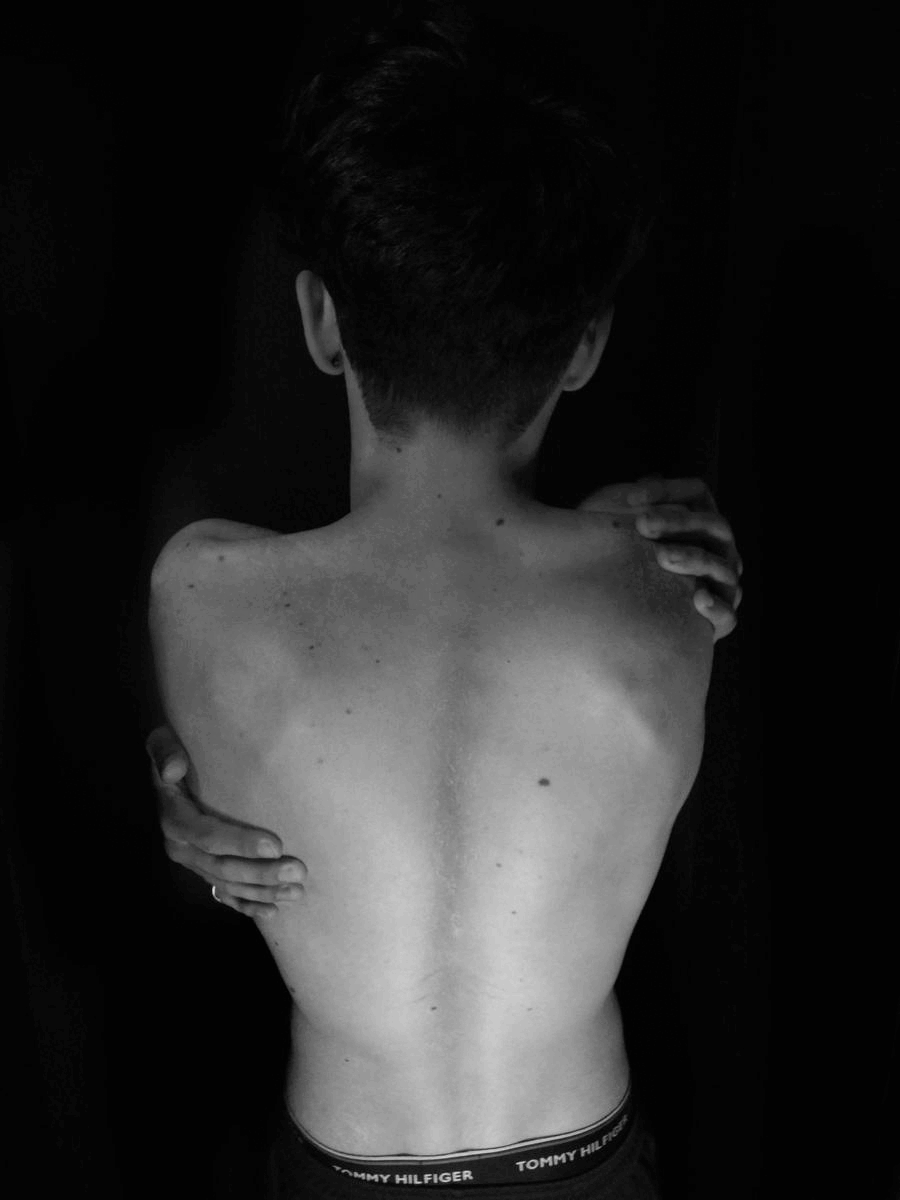
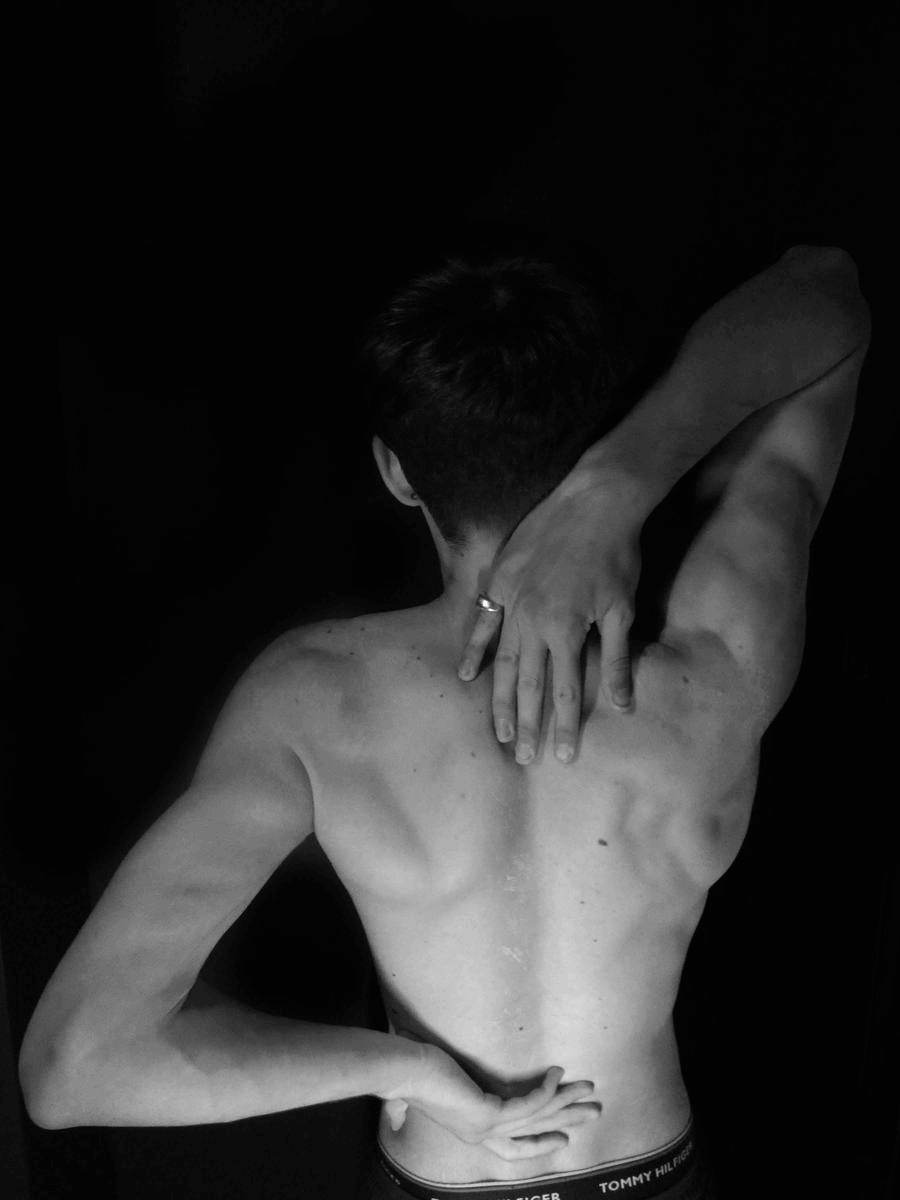
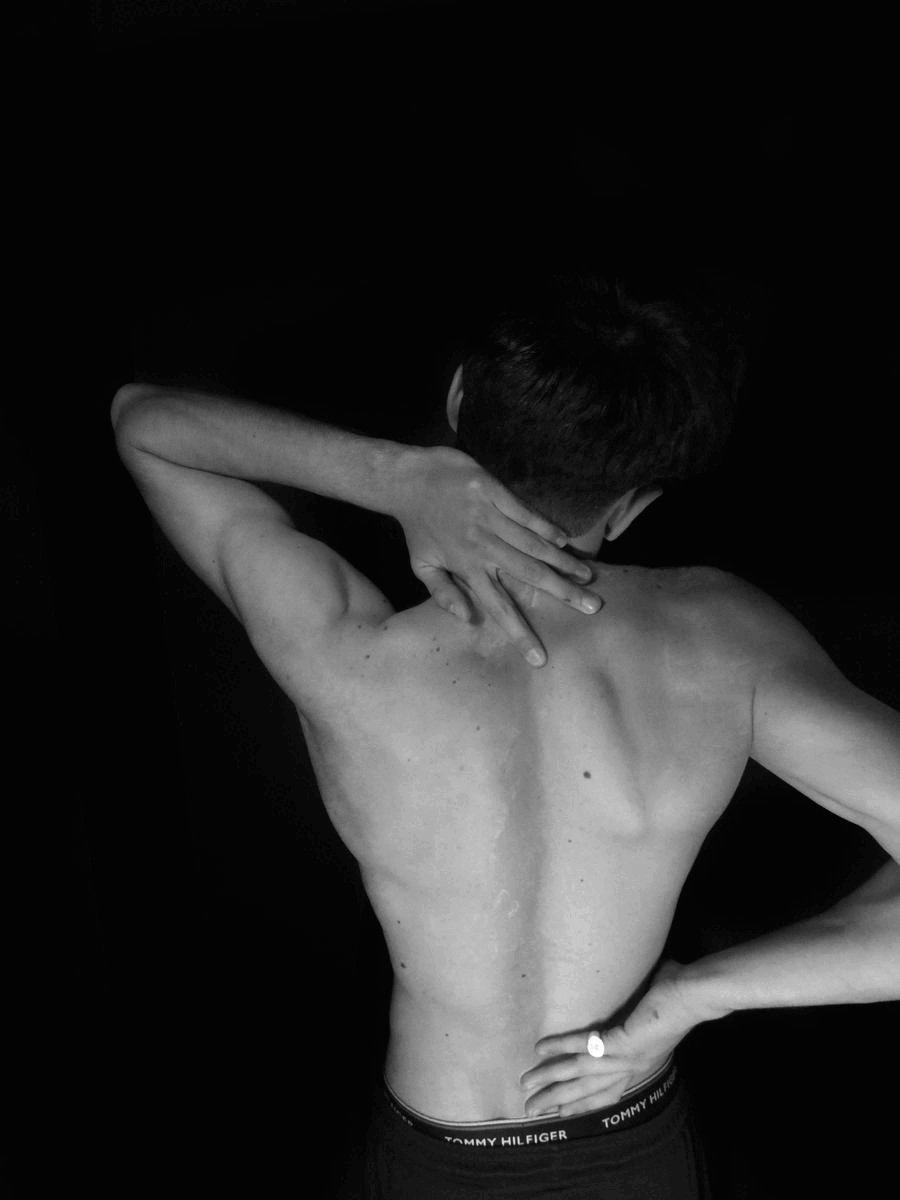
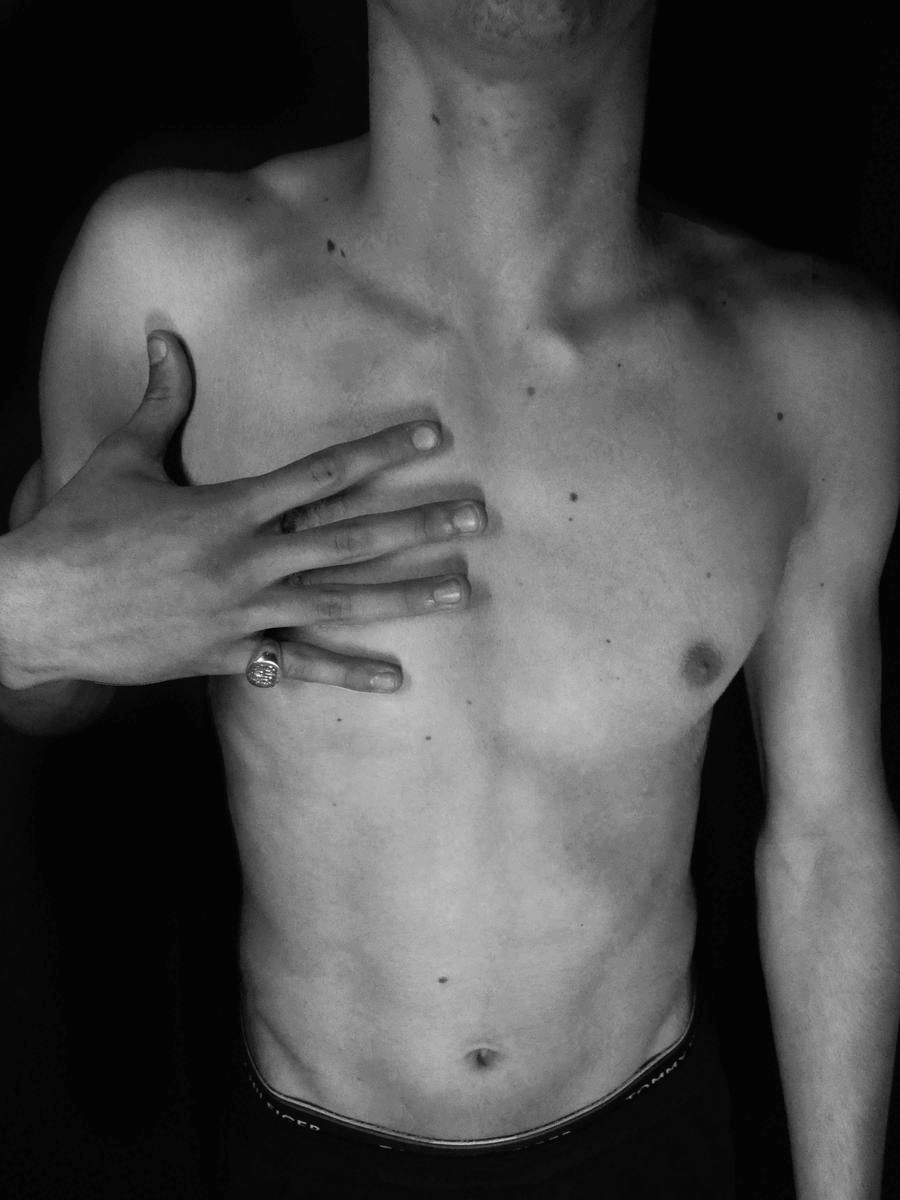
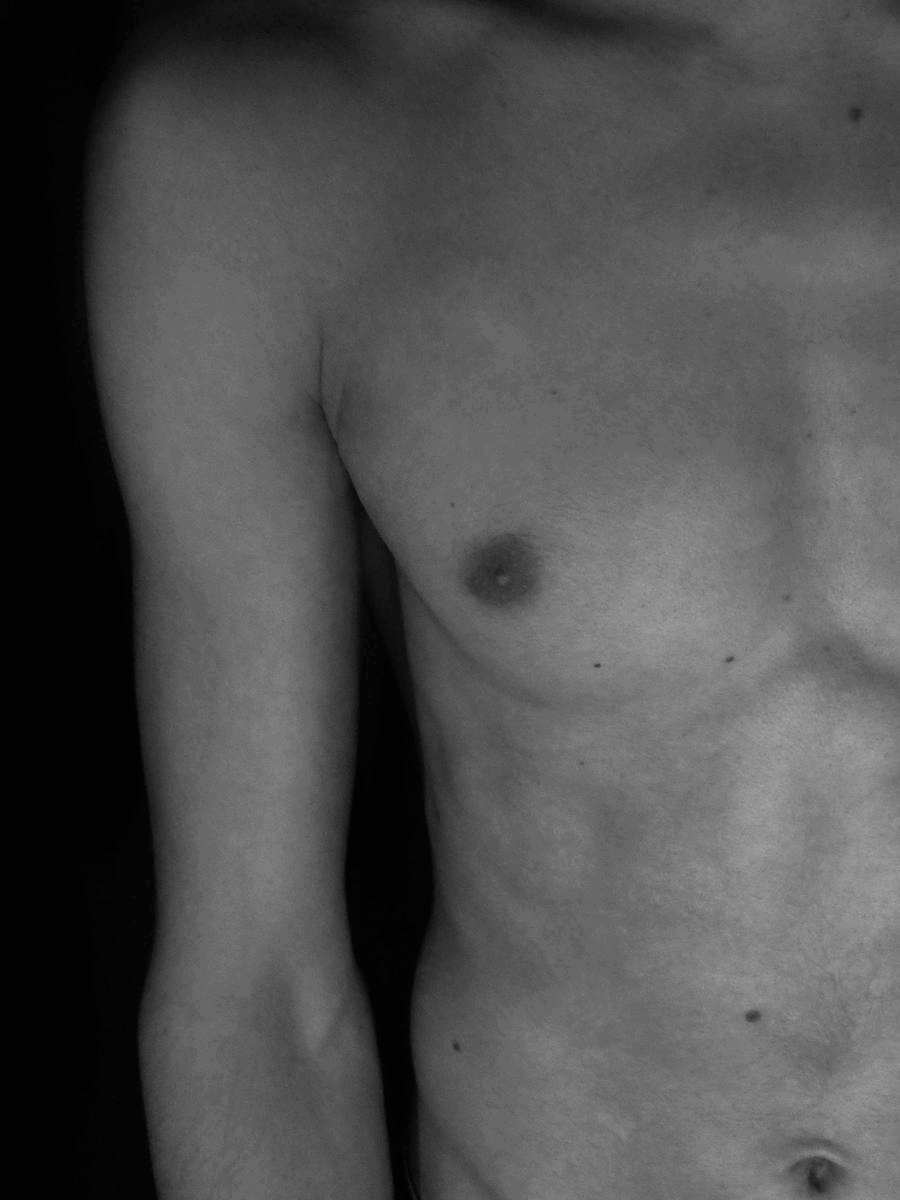
On my first photoshoot, the final outcome of the photos was a success due to the compositions. The portrait pictures were taken on a Panasonic DC-FZ82 camera, meaning the photographs were high quality due to the new modern technology cameras, making my work more refined, for the F-stop was f/2.9 meaning the aperture is very low, with the camera opening very small making my portrait pictures more detailed. The exposure time was place on a 1/200 sec making the picture quite contrasted and more darker making the background completely black making the edits turn out more of a success. A new exploration would be that even though my portrait photographs were taken inspired by metamorphosis, I still changed the background as last time it was completely white, whilst this time is completely blacked out, giving a new refinement to finish off my work. The models poses kept on changing during every picture, exploring with new concepts whilst keeping the theme related to abnormality and excruciating pain. For the nature pictures I did pictures of old antique trees, with cracks running down the base, so once double exposed together it would give the idea of the models body being ripped apart with the little excess trees in the cracks as flesh, coming a new composition idea to metamorphosis. The tree pictures were taken on a new modern updated version of the Panasonic DC-FZ82 camera, with the f-stop being on f/4.9 making the photograph more detailed and make the tree look as if it is in 4K. I took pictures of the trees in different camera angles, to where the natural light was not too much lighting making the tree photo more flashy and difficult to edit.
process log

step 1 : pick out one of the portrait pictures on the contact sheet and open them up on the Abode Photoshop 2016 version.

step 2 : change the image to black and white and change the colour contrast to where the background has gone completely black and the models body is quite bright so then you change the brightness.

step 3 : lower the brightness to an extent where the background has completely perished and it seems as if you are looking into the abyss. then increase the contrast, to an extent that the models body has more shadows and evening out the body parts

step 4 : press the curve logo on the far right of the screen, and lower the curve to where it is lowering the brightness, whilst increasing the contrast, giving the theme of metamorphosis.

step 5 : once finishing the portrait editing, pick out one of the images of the old trees with cracks running down them and open them up on Abode Photoshop 2016.

step 6 : press the black and white logo on the far right of the screen, and change the colour contrasting to an extent that t makes the crack loom realistic if it were to be double exposed onto the models body

step 7 : once finished editing, draw on the page with the quick select and only copy and paste the crack onto the persons body and move it around to what suits best

step 8 : to finish it off draw on the edges w9th the rubber band with the opacity level as zero, and then earase until the body is finished.
developments - inspired by metamorphosis


For my first developments, The edits were made in a black and white series with the work being related to my metamorphosis page. I changed the aspect up as the background is pitch black and instead of it being completely white, refining my work in a different composition. The reason why I made the background pitch black was so then when I double exposed the tree crack onto the models torso it would seem more realistic and change the aspect as well to something quite gloomy and painful. For all of my edits, the models pose changed by edit where some pictures were taken of the back whilst some were taken of the front side of the body and for one I did where it would seem as if the tree crack was running down the models forearm, giving that sense of experimenting into further detail. A key aspect on this photoshoot, would be how I kept the work of the models body contrasted to an extent, that the models muscles would contrast from each other giving that sense of shadowing, and making the person viewing the picture the feeling of spookiness. The images at one point were to dark especially when increasing the contrast so I did increasing the brightness making the picture seem as if the lighting was natural lighting, the aim was not increase it too much to where there was the sense of a very flashy portrait image.
refining gifs - developming my final piece
for my further developments I decided to make nine GIFs where it would seem as if the wound would open up slowly in a very excruciating pain and then slowly close to where there is no more cut, I experimented in different ways of doing the GIF, which is the way they open up and close. For every nine edits each of them was a different body pose and different crack running down the models torso. The key aspect of these outcomes would be that even though the image kept on changing, due to erasing the nature picture slowly and slowly, I till managed to maintain the contrasting and brightness the same level it was as the image would keep on moving around.
Re-draft contact sheet - exploring with projecting GIF


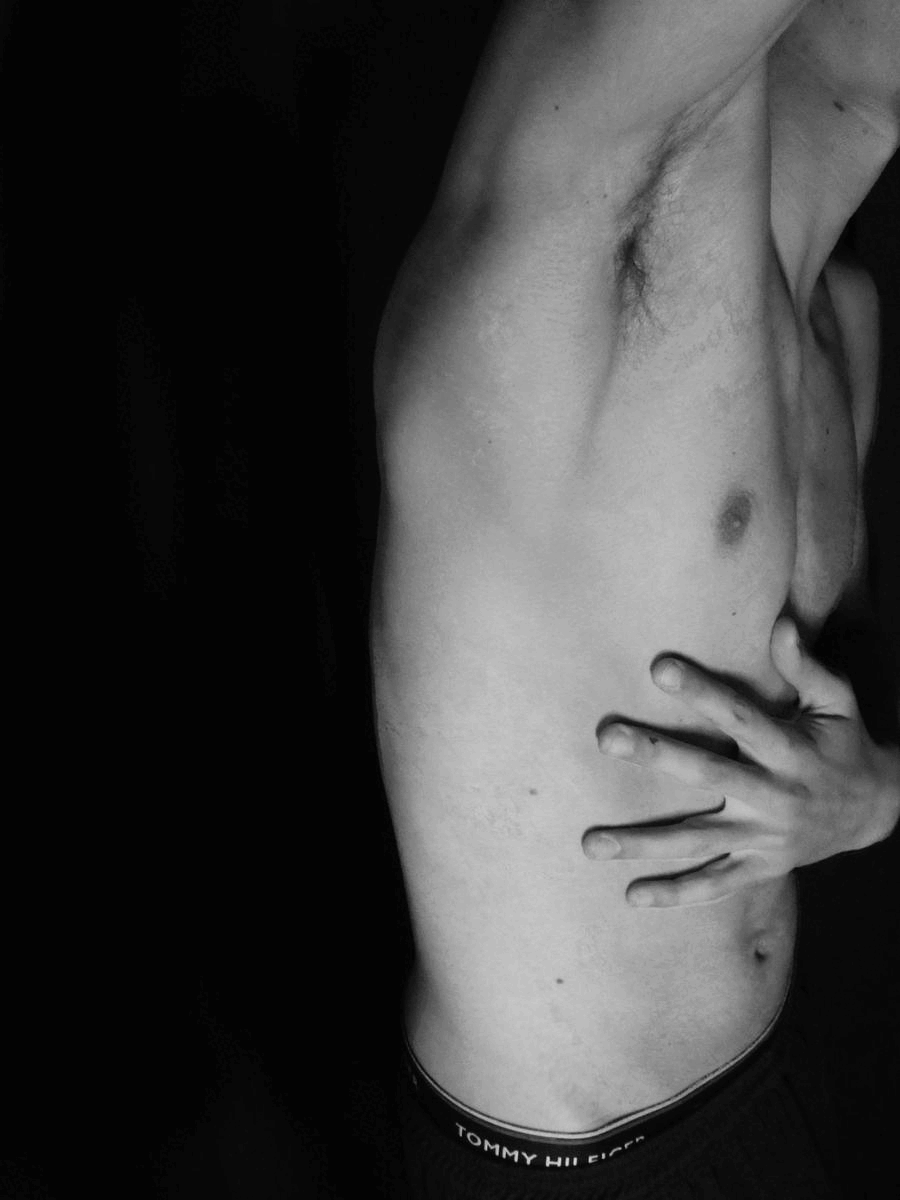
For my second photoshoot, it was a success due to the creativity and the depth of understanding on how to explore whilst still having the work related the theme. I got these photographs, from uploading my last development of GIFs onto a projector and whilst the projector was projecting the GIFs onto the wall I was standing there waving around a see through curtain giving the waviness effect of nausea. These photographs were captured on a Panasonic DC-FZ82, the same camera from the last photoshoot, the reason for this type of camera would be that the pictures would turn out more detailed and the photographs would be taken in 4K quality. The f-stop was placed automatically on f/2.5 meaning the aperture is very low, wit the camera lens opening very smaller making the picture more dark, as it allows very little light to enter. The exposure time was placed on a 1/1800 sec making the picture quite contrasted and darker making the background completely black. These photographs were taken in the studio room, in my school, with the blinds fully lowered to remove as much harsh lighting as possible, and with both of the doors closed to cut out any of the classroom lighting from entering. The key aspects on this shoot would be how much of little lighting there was interfering with the photographs, and how the creativity of experimenting with my work was still based on the style of metamorphosis.
Re-draft developments - exploring with projecting


For my edits, there was nothing to complicated to do as it will just pictures of other edits but in a different style. But I did notice for every picture that the rainbow was involved when you would wave the curtain about due to the angle of the projector, so I just pressed the black and white logo in Abode Photoshop 2016 version, to make them black and white again and to lose the rainbow colours. I also increased the contrast a lot to where the background vanished, I also had to increase the brightness as with all the contrast it made the models body darker and more difficult to see, so with i8ncreasing the brightness it levelled the picture as it used to be before.
Re-draft developments - exploring with projecting


For my further developments, I did a different range of double exposing edits, some where I picked out two edits and double exposed them together whilst the other ones I used one picture and mirrored them together where they were overlapping each other. the key aspects of these pictures would be how I managed to compose the brightness and contrasting, when I overlapped the images together, as usually it would turn out more darker leading me to draw with the dodge tool across the page the re-enlightened the image, whilst this time it was more of a simple process.
Re-draft developments - exploring with projecting
annotation
highlighting success


annotation